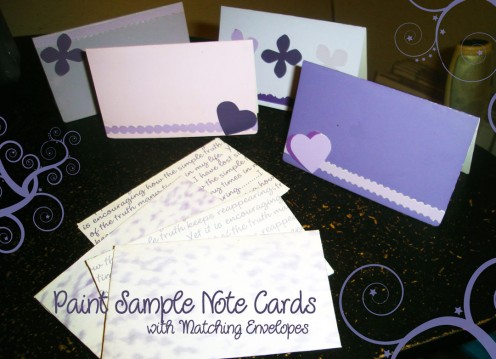
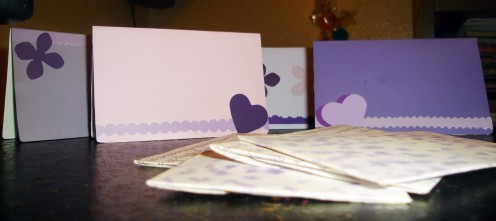
Paint Sample Crafts: Make Note Cards with Matching Envelopes

In case you haven't learned already by reading my hubs, I am completely obsessed with reusing/re-purposing things. I saw some little match books on the internet made with those paint sample cards you can get at hardware stores and that is what inspired me to make these adorable little cards out of paint sample cards/swatches. They are basically just a small card a little bit bigger than the size of a gift card. They are 21/2 inches by 4 inches when finished. They are just the cutest little things! The perfect size for a sweet little love note or thank you note and you could even include a gift card inside if you wanted. These are made from some 4 inch by 5 inch paint sample cards I had picked up from Lowe's in various shades of purple. They are larger (more like a square-bit smaller than a photo) than normal paint sample cards and the corners were already rounded which is a really nice touch for these little cards.

What You Need
- 4 inch by 5 inch Paint Sample Cards (From Lowes, Home Depot, Wal-Mart, etc)
- Scissors
- Paper Glue (glue sticks work great!)
- Few Sheets of Thick Paper (for the matching envelopes)
- Shaped Paper Punches (optional)
- Decorative edged scissors (optional)

Let's Get Started!
How To Make The Cards
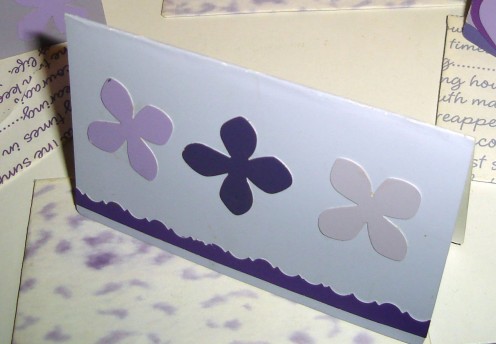
First thing you do is take Your paint sample card and fold it in half. Then punch or cut out some shapes from another paint sample card. These will be for embellishing your card. As you can see, I did mine in different shades of purples. After you have all your paper shapes punched, glue them on your card however you like. Something else I did was cut some strips of different colors of purple from the paint sample cards with my decorative edged scissors. These ended up being little decorative borders on my card. That is pretty much it when it comes to the cards...Talk about easy and quick!
How To Make The Envelopes
I scanned and uploaded an envelope template for you below. Just click on the template below, save it to your computer and then print it out-it is important to make sure it prints at full size. After printing, cut it out and trace it onto the paper you are going to make your envelope with. After you cut out the traced envelope it will be helpful to lay your card on the top, inside all the dotted fold lines and then fold your envelope with your card in place. It will help you get straight and accurate folds- I don't have a bone folder so I have to improvise :0) Once you have it folded and ready to glue, simply fold in the little side flaps and put a line of glue on each of them and then fold the top flap up and over and glue in place. I put a book a heavy book on mine so the pressure will help to get a good stick. You could even embellish your envelopes to match your cards.


Ideas...
Of course just like with any craft project, there are tons of possibilities with this. These can be decorated all sorts of ways. You could use scrapbook paper to embellish your cards and limit the paint sample cards to use just as the base card. You could use stickers, glitter, rubber stamps, markers or paint to embellish your little cards with. Why not glue a little photo on and make a little photo card or make a little window card with the photo inside the card... There are so many things used now to embellish cards like rhinestones and cute little metal charms. If you have a Cricut or some other digital cutting machine you could use that and cut shapes, letters or words to decorate your card. What about a little monogrammed initial card? I am picturing something simple with an initial on it. You could make a matching set and tie it together with a pretty ribbon to give as a gift. Valentine's Day is coming up.. these are the perfect size for little valentines cards, too!
Whatever you decide to do I'm sure they will turn out cute as a button! I hope you have enjoyed my paint sample swatch/card tutorial.
Happy Crafting!


")


